
I know that fall burlap wreaths have been all the rage for several years. I’m just now jumping on the bandwagon. I never really wanted one until I saw a few on Pinterest.
After seeing all the fall burlap wreaths, I decided to make a trip to Hobby Lobby to stock up on everything I need.
I’m included a few links at the end of this post if you’d rather shop online.
Watching TV Is The Perfect Time To Make Your Fall Wreath
I’m a multi-tasker. So, on a Friday night, while the hubs and I watched something on TV that he had recorded a few days ago, I worked on my wreath. You know I can’t do one thing at a time.
I did look at several tutorials, but just couldn’t get the hang of any of them, so I just did my own thing. That’s how I roll! 🙂
Also, in the last picture, the one of my fall wreath hanging on my front door, it looks like the burlap is darker at the top of the wreath than at the bottom (or am I the only one noticing this?).
It’s just the way the sun is shining on the door and I didn’t want to wait to take another pic. It’s all good!

Using my old work table made it much easier!
Supplies Needed To Make A Fall Burlap Wreath
- wire wreath frame
- roll of burlap ribbon (about 3-5 inches wide)
- faux fall flowers, pumpkin, and grasses
Tips For Making a Fall Burlap Wreath
First Things First: I don’t like to have to tie things on and that sort of thing, so I made my wreath without using hot glue, florist wire, or anything.
I’ve had my fall burlap wreath on my door for over a week. Nothing has dislodged.
It still looks the same as the day I made it. And, believe me, the grandkids have been in and out over the last few days so the front door has been slammed numerous times.
I started from the back of the wire wreath and just took turns pushing the roll of burlap up between the three wires, fluffing it, and going in between the next wire, making sure I went between each of the three wires each time.
Keep pushing the loops close together so the frame of the wreath doesn’t show.
Check to make sure you are making the same size loops. I noticed I had a tendency to get bigger and bigger with the loops, so I did have to adjust a few of them.
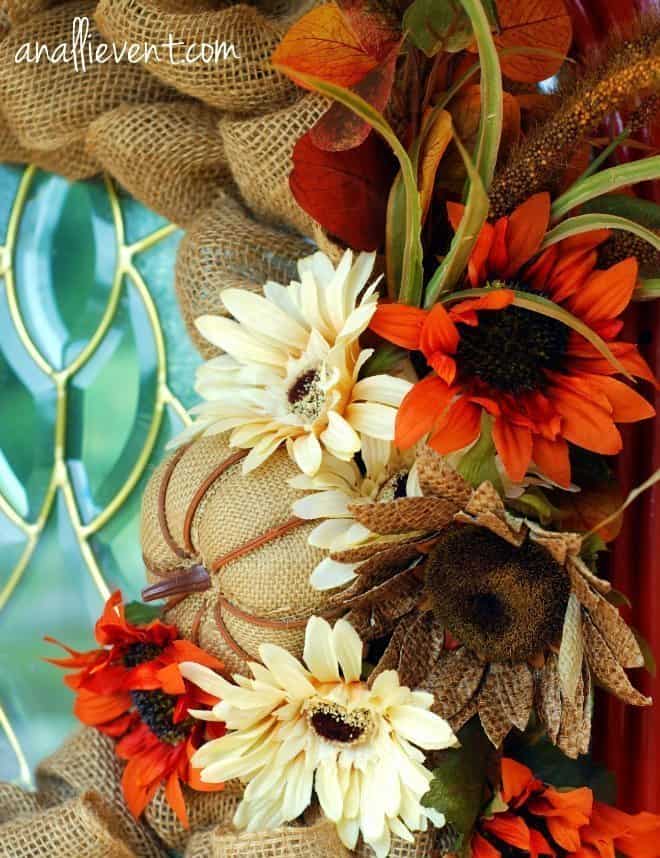
When you’re finishing up. leave an area covered with burlap, but with smaller loops. This is where you want to place the flowers, pumpkin, and grasses.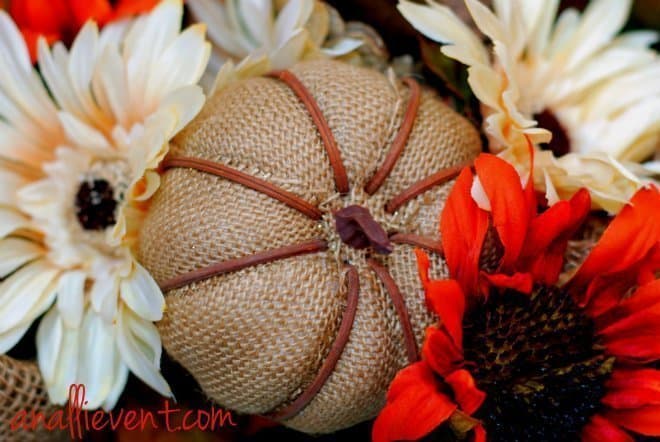
And, that’s it. I have a clear command hook that I leave at the top of the glass on my front door to hang wreaths. It didn’t take over 20 minutes to make this fall wreath. I should have timed it.
I did make a fall ribbon bow, but I felt like it distracted from my fall burlap wreath because of all the fluff of the burlap going on. So I didn’t attach it. Feel free to add a bow if so desired.

You May Also Like
- Fun Girls Night In
- Dining Room Chairs Refresh
- Glamping Christmas Tree Decor
- Thanksgiving Day Tablescape
Fall Burlap Wreath
This fall burlap wreath is easy to put together and it's so cute. After weaving the burlap through the wire wreath, can add the flowers, grasses, and pumpkin of your choice to personalize this wreath.
Materials
- 1 wire wreath frame
- Roll of burlap ribbon (3-5 inches wide)
- Faux fall flowers, pumpkin, and grasses
Tools
- hot glue gun (if you chose to glue the pumpkins and flowers)
Instructions
- Start from the back of the wire wreath and push the end of the roll of burlap up between the three wires, fluffing it, and going in between the next wire, making sure to go between each of the three wires, making loops, one at a time.
- Keep pushing the loops close together so the frame of the wreath doesn't show.
- As you go along, make sure you are making the same size loops. I noticed I had a tendency to get bigger and bigger with the loops, so I did have to adjust a few of them.
- When you're finishing up. leave an area covered with burlap, but with smaller loops. This is where you want to place the flowers, pumpkin, and grasses.
Recommended Products
As an Amazon Associate and member of other affiliate programs, I earn from qualifying purchases.
-
 Sunflower Pick | Hobby Lobby | 1564822
 -
TITA-DONG Artificial Fall Flower Picks,10.5inch 3 Pack Thanksgiving Autumn Harvest Pumpkin Maple Leaf Berry Sunflower Twig Stem for DIY Wreath Supplies Flower Arrangements
-
CraftMore Wheat Fall Pick Set of 6
-
Buffalo Plaid Fabric Artificial Pumpkins Assorted Size - 3PCS Orange and White Large Pumpkins for Fall Decor, Buffalo Check Pumpkins Perfect for Halloween Thanksgiving Decoration Fall Wedding Decor
-
Burlap Ribbon, Wide Natural, 5 Inch x 10 Yard Loose Weave Roll for Crafts and Décor (1 Roll)
-
FloraCraft Wire Wreath Form 20 Inch Green


34 comments
Your wreath is GORGEOUS! Definitely worth driving all the way to Hobby Lobby to secure your supplies!
Thanks so much! I really need to go check out your cloth napkin tutorial. I love them but they are so costly!
Alli, your wreath looks beautiful! You did such a beautiful job and it looks just perfect on your door! Thanks for sharing and pinning! Have a happy Monday!
Thanks!
This is beautiful, Alli! I haven’t tried a burlap wreath yet, but you’ve inspired me to give it a shot! Thanks for sharing!
~Abby =)
Thanks! I thought I was the only one that had not tried one yet! 🙂
What a gorgeous wreath! You adorned it so perfectly…..and I hear ya on what you need to do when you “just want to get some fabric”. Hobby Lobby is an hour from me, so I constantly have a “Hobby Lobby Shopping List” going!
Hobby Lobby is an hour from me, too! I always have a list on my cell phone! Can’t wait to check out your chicken parm. soup. Sounds heavenly!
This is so pretty!!
Thanks!
Beautful!
Thanks!
I’ve never used one of those wreath forms or burlap ribbon either, it looks fabulous!
Thanks. It was so easy! I’m all about easy!
Hey Alli,
First let me say your wreath is just gorgeous. I went to Michaels over the weekend with the idea of trying another wreath project that I had seen on another site. It called for 45 yards of tulle cut 6 inches wide. Well to me paying 9.99 a spool for that much tulle or burlap was just a bit ridiculous. So, after having danced around the bush once again I’ll get to my question. Do you mind telling me what size wreath form you used and how much of the fabric. Thanks so much in advance. Have a blessed day. <3 Kim
I used two spools of burlap garland (total of 20 feet) and the 16″ wreath frame. I went to Hobby Lobby for everything except the burlap garland. I bought it at JoAnn’s Fabrics. They had burlap wreaths already made up at Hobby Lobby for almost $100.00 each! They were a little bigger than mine but I didn’t think they were that cute and certainly not $100 cute! I didn’t really add up the cost, but it wasn’t that much at all. I know it wasn’t over $35.00, if that much.
Thanks so much for your comment!
Thanks Alli,
You’re a doll. <3 Kim
This is so pretty! 🙂
Thanks for joining the Link Up this week!
Thanks for having me!
I am absolutely in love with this! What a beautiful wreath! I’m adoring the burlap. It’s absolutely stunning! I almost want to run by your house and snatch it. 😉 hehe
Come on by! 🙂
Wow I am so behind I have never seen these before but they look amazing. You did a great job, the ruffles with the burlap sack gives it such an appealing look. I totally want to make a Christmas burlap sack wreath 🙂
Make sure you post about it when you make it! Would love to see it!
Alli!!! I love your wreath and I’m so glad I was able to inspire you. Yours turned out beautifully!!!! Love, Love, Love it!!!
xoxo
Denyse
Thanks! I had some great inspiration! 🙂
I haven’t liked a lot of the burlap things I’ve seen–but I love this! Great job! Thanks for linking up at Bloggers Brags Weekly Pinterest Party. I pinned your wreath to the Bloggers Brags Pinterest Board and to my personal boards.
I haven’t liked a lot of burlap things, either. I guess that is why it took me so long to try it. Thanks for your wonderful linky party!
I like both fall wreaths you made. I will definitely make one. How soon can you start putting out fall decor. I cleaned my porch today and just wondering. I don’t want to decorate twice
Now that it’s September, go ahead with the fall decor, Felicia!